Manually annotate in Neuroglancer
This guide demonstrates how to add point annotations manually to a neuroglancer view. To generate a starting neuroglancer view, we recommend using ndwebtools. For this demo, we have made this neuroglancer view available to use.
Open JSON editor
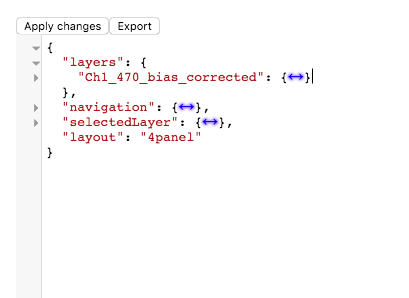
Click on the JSON editor (top right corner of the web browser and looks like {}). The results should look something like:

Open layers
Click the blue arrows next to “layers”. The result should look like this:

Add annotation layer
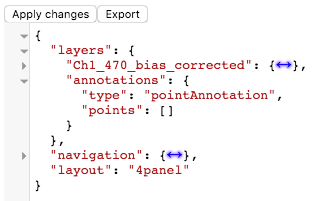
Now, add a comma at the end of the line underneath “layers”. Then copy and paste this on the next line:
"annotations":
{
    "type": "pointAnnotation",
    "points": []
}
The result should look like this:

Select the annotation type
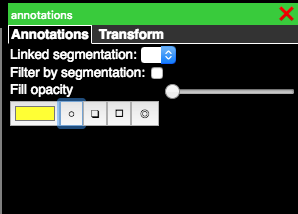
Right-click on the new channel called “annotations”. Now click on button to the right of the color (highlighted in blue in image below):

Add points
Now that you have selected the point annotations, you can ctrl + click on any location in the image and yellow spheres will show up at those locations. The locations are stored in the JSON editor and can be accessed at any time by clicking the {} in the top right of the web browser.
Key combinations
- Ctrl+LMB: Add Annotation
- Ctrl+RMB: Select Annotation
- Alt+LMB: Move Annotation
- Ctrl+Alt+RMB: Delete Annotation
Share
To share these data, click the ⇧ icon in the top right navigation aria. This will change the URL field in the browser to a short one that can be easily copied and shared. The URL should be similar to this: https://viz.neurodata.io/?json_url=https://json.neurodata.io/v1?NGStateID=c-D79XYYWJngLw